AI API
e host a variety of AI agentsservices nowhere havefor progressedeveryone to ause level- whereall theydata stays within HKI and you can beuse quiteas usefulmany totokens doas evenyou larger structural tasks on whole projects. This is often done using specialized IDE (for example Cursor) or plugins (JetBrains AI, Roo Code). There are even terminal-based tools, for example aider.want.
While we have ChatGPT, I was not able to get an OpenAI API key to run (it always says we are rate-limited). But fortunately we can host very capable AI agents on our servers.
The models are hosted via vLLM. The best results can be achieved using Roo Code.
Requirements
You will need an account on the LiteLLM server https://asb.hki-jena.de/lllm/ (Send a mail to ruman.gerst@leibniz-hki.de and request an account)
You will get an invitation link where you then can create your password.
Use the shared key
Please use this key only if you are accessing the API from within HKI: sk-A8D04IxBdQIXz_USnxvXug
Create your own key
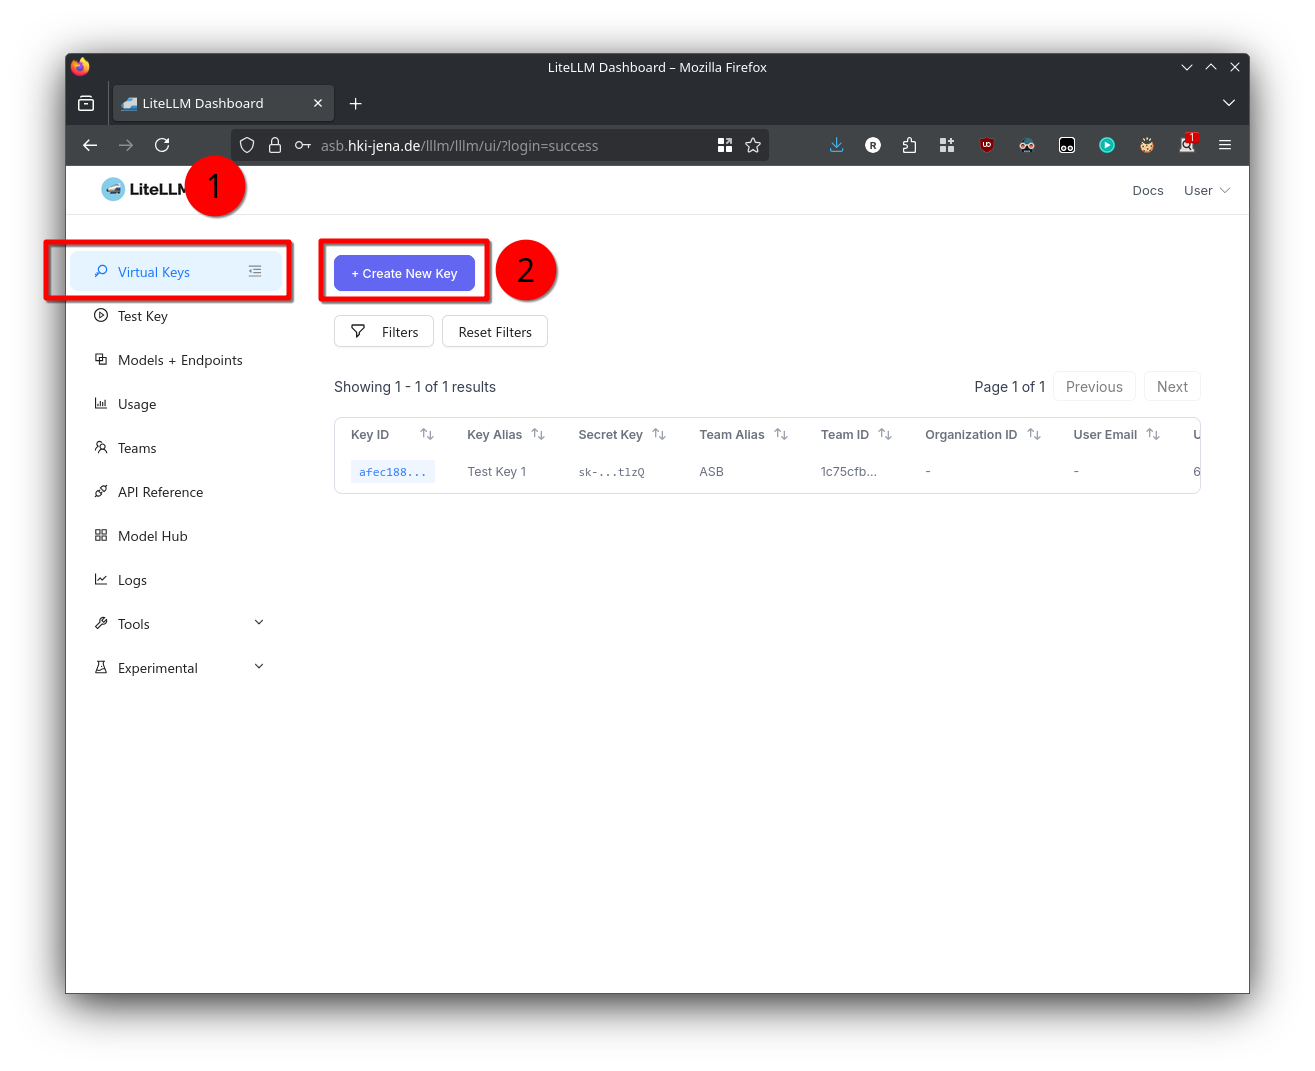
- To access the admin panel visit https://asb.hki-jena.de/lllm/ui
- Go to the Virtual Keys section
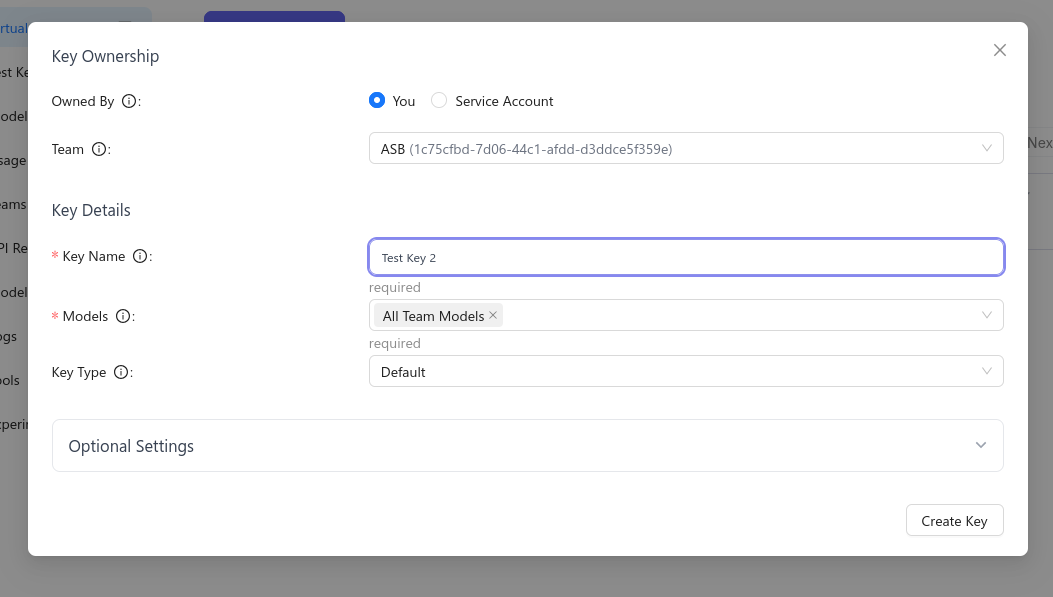
- Click the Create New Key button
- Set the Team to ASB and select that it should use All Team Models
- Set the key type to API, otherwise the key can control account settings
- Remember the key or copy it into notepad - you will need it to access the API
Usage with Roo Code (best result so far!)
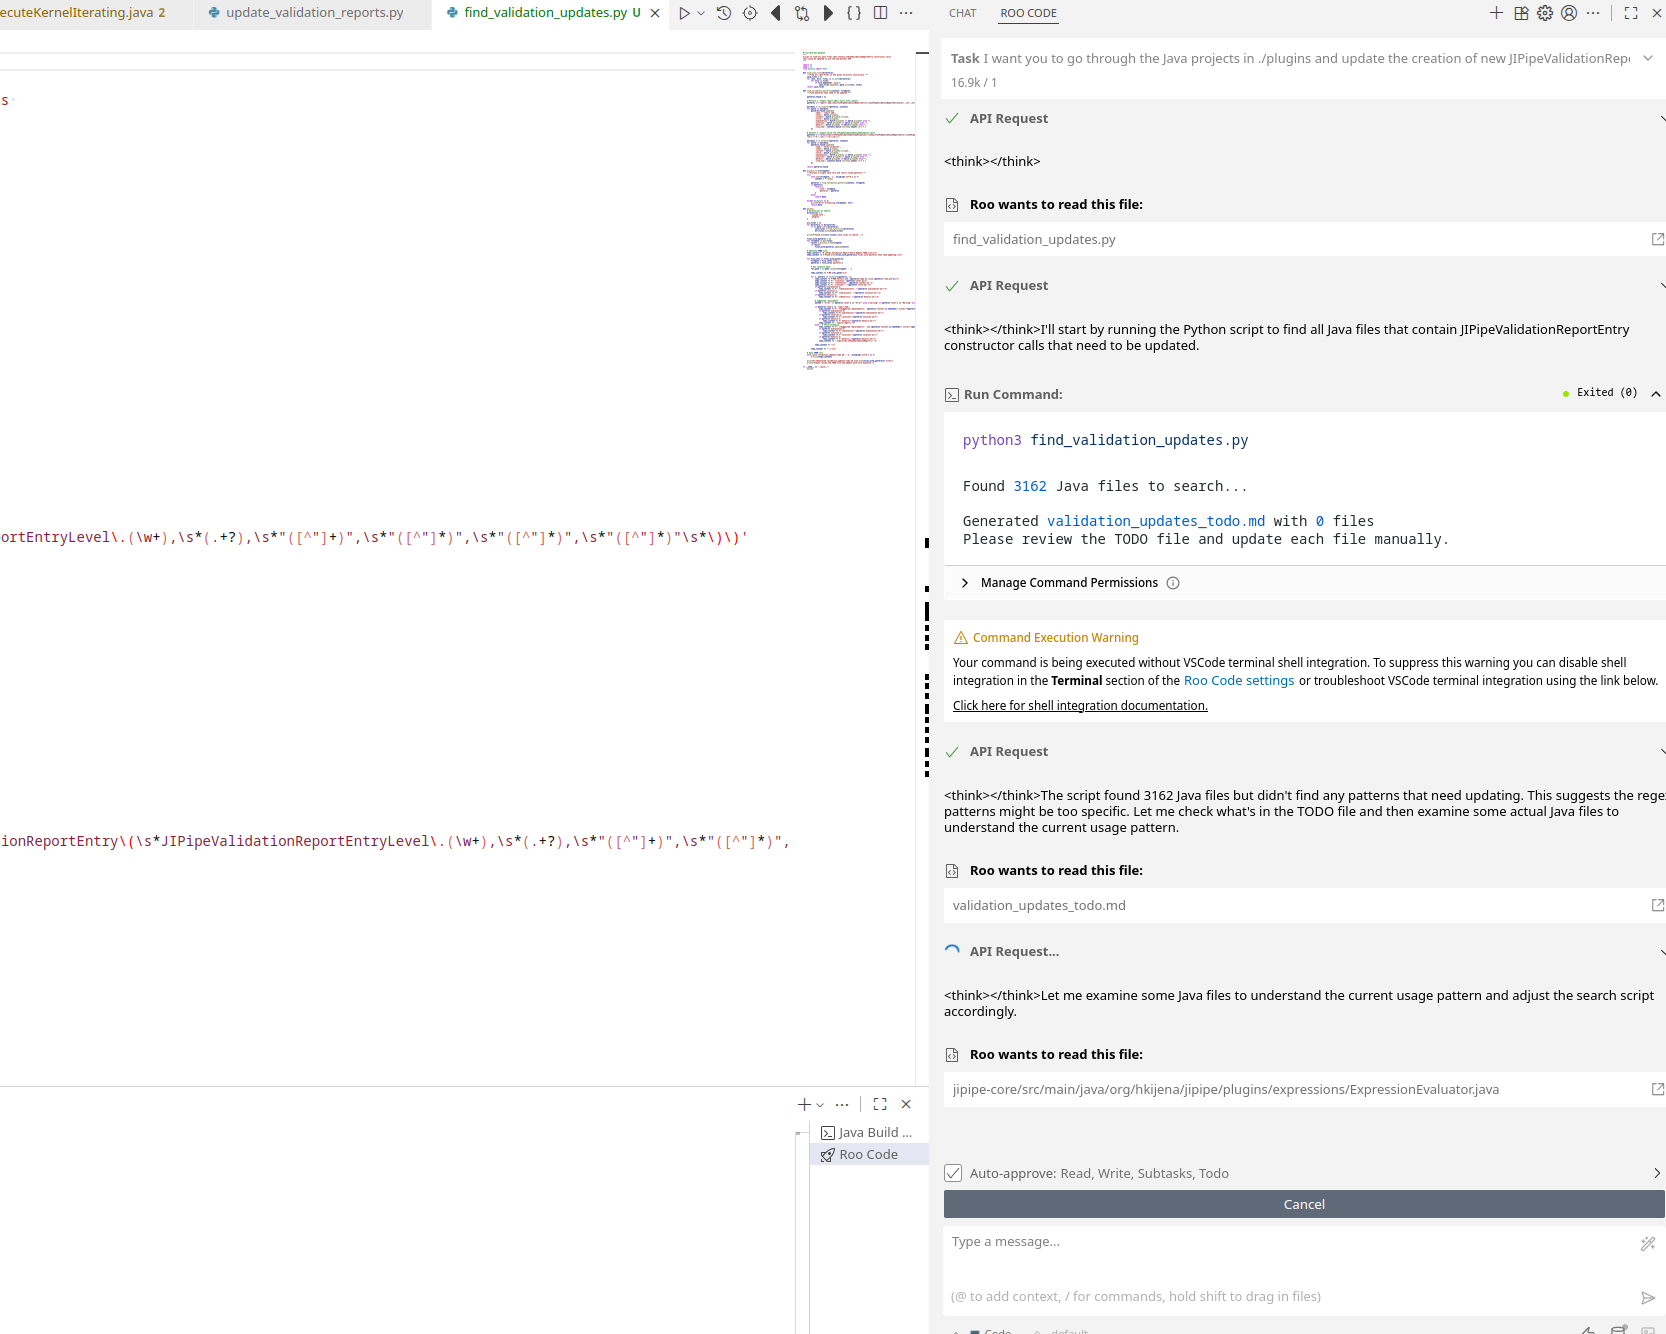
Roo Code is a plugin for Visual Studio Code which adds very powerful AI agent capabilities into the software. Install it using the Extension panel on the left side.
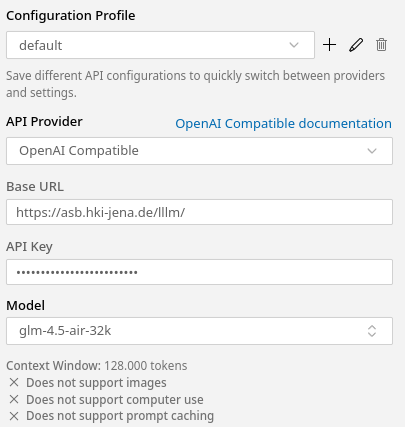
During the initial setup, put in the following values:
API Provider: OpenAI CompatibleBase URL:https://asb.hki-jena.de/lllm/API Key: The API key you generatedModel: Choose the one you want (see below)Image Support -> UncheckedComputer User -> UncheckedPrompt Caching -> UncheckedContext window size -> According to the model (2048, 32768,128000)
| ||
Roo Code has multiple modes:
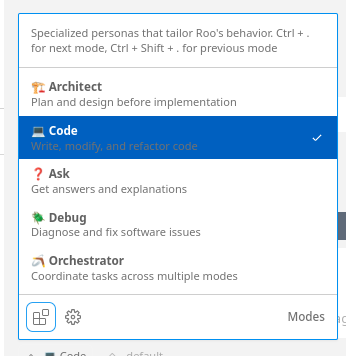
If you want to do simple edits, go with the Code mode. For larger changes that may require multiple steps, use the Orchestrator mode.
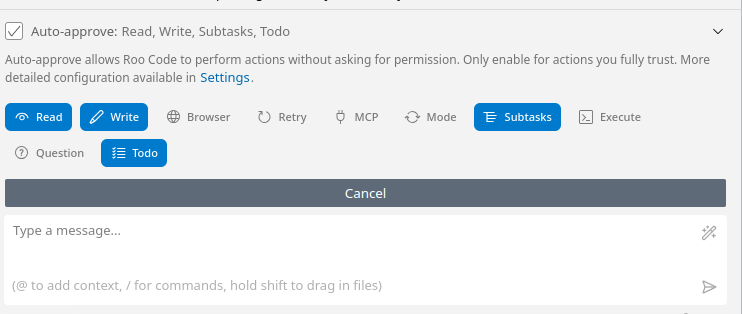
By default Roo Code will ask to approve any action that it will take. Use the button above the chat to selectively turn on auto-approve (careful with commands! see here)
AGENTS.md
An AGENTS.md file can be created at the root of the project(s) to act as guidance for AI agents that should work with the code. You can generate it with RooCode by running in the chat window the following command:
/initExamples
Usage with Jetbrains AI
Currently broken because JetBrains refuses to work on that feature properly:
https://youtrack.jetbrains.com/issue/LLM-15339/Third-party-providers-use-OpenAI-API-for-all
(It's not that great TBH)
Update: there is a plugin that integrates RooCode into Jetbrains IDE: https://github.com/wecode-ai/RunVSAgent
Usage with aider (CLI tool)
Install aider using the oneliner:
curl -LsSf https://aider.chat/install.sh | shThen create in your home directory two files:
~/.aider.conf.yml
openai-api-key: <YOUR KEY>
openai-api-base: https://asb.hki-jena.de/lllm/
model: openai/vllm/glm-4.5-air-128k
weak-model: openai/vllm/gpt-oss-120b-128k
chat-language: English
~/.aider.model.metadata.json
{
    "openai/vllm/glm-4.5-air-128k": {
        "max_tokens": 128000,
        "max_input_tokens": 32000,
        "max_output_tokens": 4096,
        "input_cost_per_token": 0,
        "output_cost_per_token": 0,
        "litellm_provider": "openai",
        "mode": "chat",
        "reasoning_tag": "think",
        "remove_reasoning": true
    },
     "openai/vllm/qwen3-coder-64k": {
        "max_tokens": 64000,
        "max_input_tokens": 32000,
        "max_output_tokens": 4096,
        "input_cost_per_token": 0,
        "output_cost_per_token": 0,
        "litellm_provider": "openai",
        "mode": "chat",
        "reasoning_tag": "think",
        "remove_reasoning": true
    },
     "openai/vllm/gpt-oss-120b-128k": {
        "max_tokens": 128000,
        "max_input_tokens": 32000,
        "max_output_tokens": 4096,
        "input_cost_per_token": 0,
        "output_cost_per_token": 0,
        "litellm_provider": "openai",
        "mode": "chat",
        "reasoning_tag": "think",
        "remove_reasoning": true
    }
}
Then you can start aider in any directory (just read their documentation).
Host models on your PC
Please note that running AI models requires a strong PC; ideally with a GPU. Otherwise ollama/lmstudio will keep everything in RAM and run everything through CPU computing which is very slow.
Ollama
I recommend ollama only for server-side usage or if dependent tools don't support lmstudio. You can follow the official installation instructions to get ollama working.
Usage:
# Pull a model

ollama pull gemma3

# Run a model (will pull if model does not exist)

ollama run gemma3
The default context size of ollama is 2048 tokens, which is quite small. You'll have to create a new model with a changed context size:
ollama run gemma3

/set parameter num_ctx 32768
/save gemma3-32k
/exit

# Now you can run the new model

ollama run gemma3-32k
Lmstudio
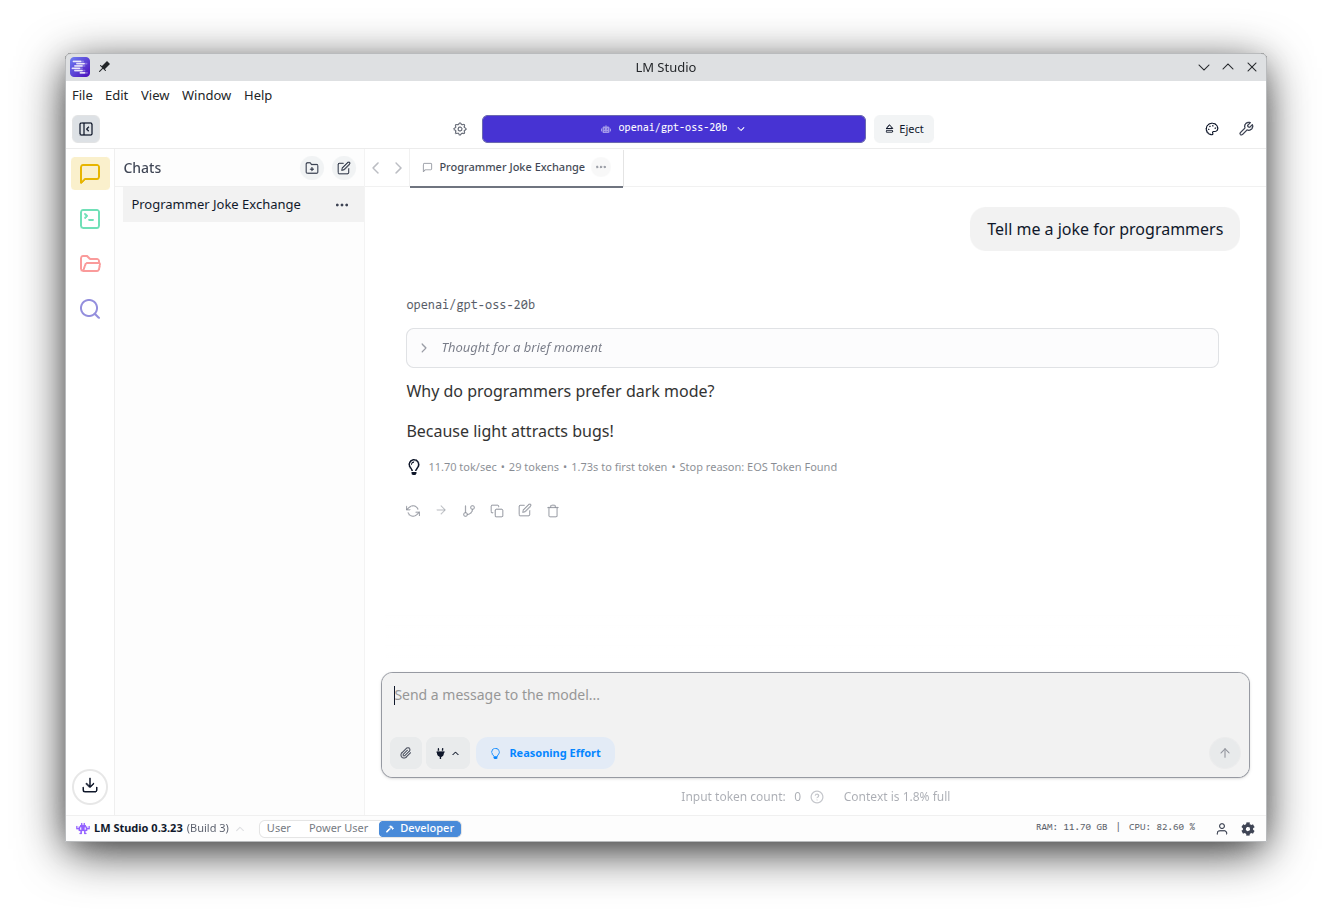
Lmstudio is a graphical interface that allows you to download and run local chat bots. It also has an optional server component that can be enabled, so other tools can make use of its backend.
On Linux it is distributed as AppImage. I highly recommend to install Gear Lever, which helps with installing AppImages (Open the AppImage with Gear Lever). Lmstudio also works very well on Windows.
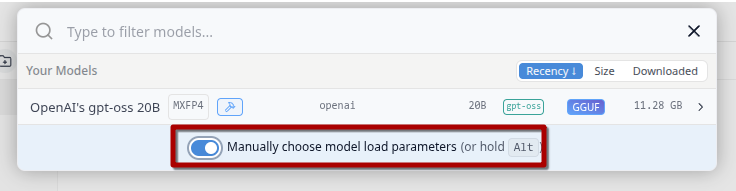
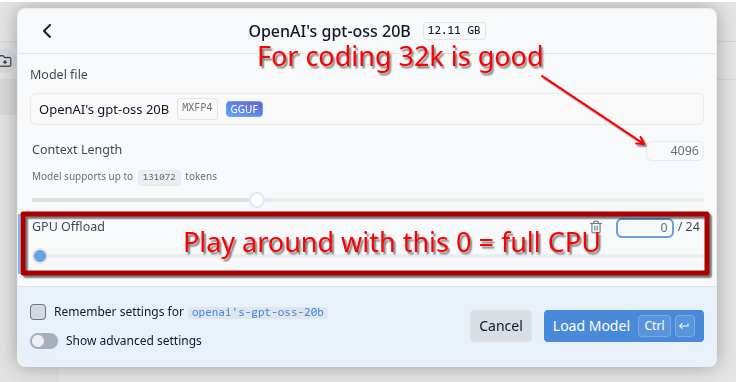
If your computer does not have enough VRAM for a model, you can always let it be (partially) run on CPU: