Local AI image editing/generation using Krita AI
If you want to use local AI video/image/TTS/... generation the current state-of-the-art tool is ComfyUI. The problem with ComfyUI is that it's actually not that comfy and a complex visual programming language with a lot of nodes (that you'll have to install yourself!). For simple image editing like how Photoshop or Canva/AffinityV3 does it it's way too complicated to set up.
Fortunately there are AI tools for the popular open source drawing/painting application Krita that work on Windows and Linux.
Available tools
The following tools may be useful for you:
| Tool | Description | OS |
| https://github.com/Acly/krita-vision-tools | For selecting objects with AI, background removal | Windows, Linux |
| https://github.com/Acly/krita-ai-diffusion | Generating AI images, changing specific parts of an image (inpainting), extending images (outpainting), ... | Windows, Linux, macOS (?) |
Installing Krita
- For Windows: just get the Setup from their official website
- For Linux: use the Flatpak if possible (if you are using Ubuntu, look up how to enable Flatpak)
Tip: You can change Krita's language by via Settings > Switch Application Language
Installing Vision Tools
- Download the vision tools from the GitHub link
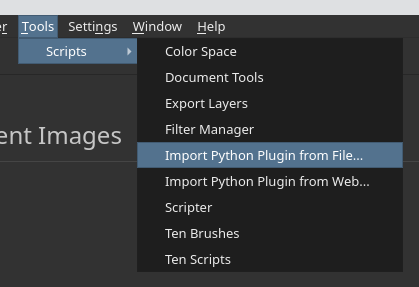
- Navigate to Tools > Scripts > Import Python Plugin from File ...
- Select the downloaded ZIP file
- Restart Krita
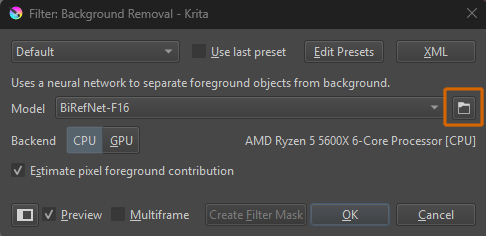
Add additional background removal models
The vision tools come only with a small background removal model pre-installed. It's recommended to also download the other models:
- Go to https://huggingface.co/Acly/BiRefNet-GGUF/tree/main
- Download the full model *-F16.gguf and the dynamic model *-dynamic-F16.gguf
- Open the Background Removal tools (you can search through commands by pressing Ctrl+Enter)
- Click the small folder icon to open the models folder
- Copy the additional models into this folder
Using nodeASB01G
A ready-to-use server running on nodeASB01G.
Connect to the following custom server:
nodeASB01G:8188
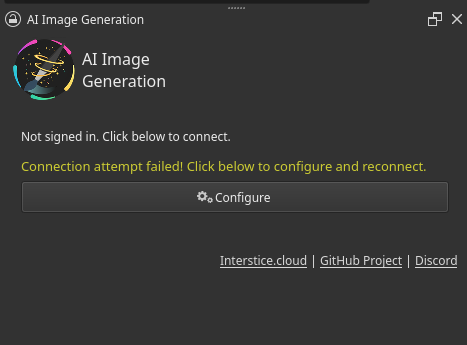
Installing AI Diffusion (Local)
This requires a good PC - especially when using Flux Kontext (Image editing)
- Like with the Vision Tools, download the ZIP plugin and run Tools > Scripts > Import Python Plugin from File ...
- Open the AI Docker by navigating to Settings > Dockers > AI Image Generation (you can only enable the docker if you have an image opened)
- Click the Configure button in the docker
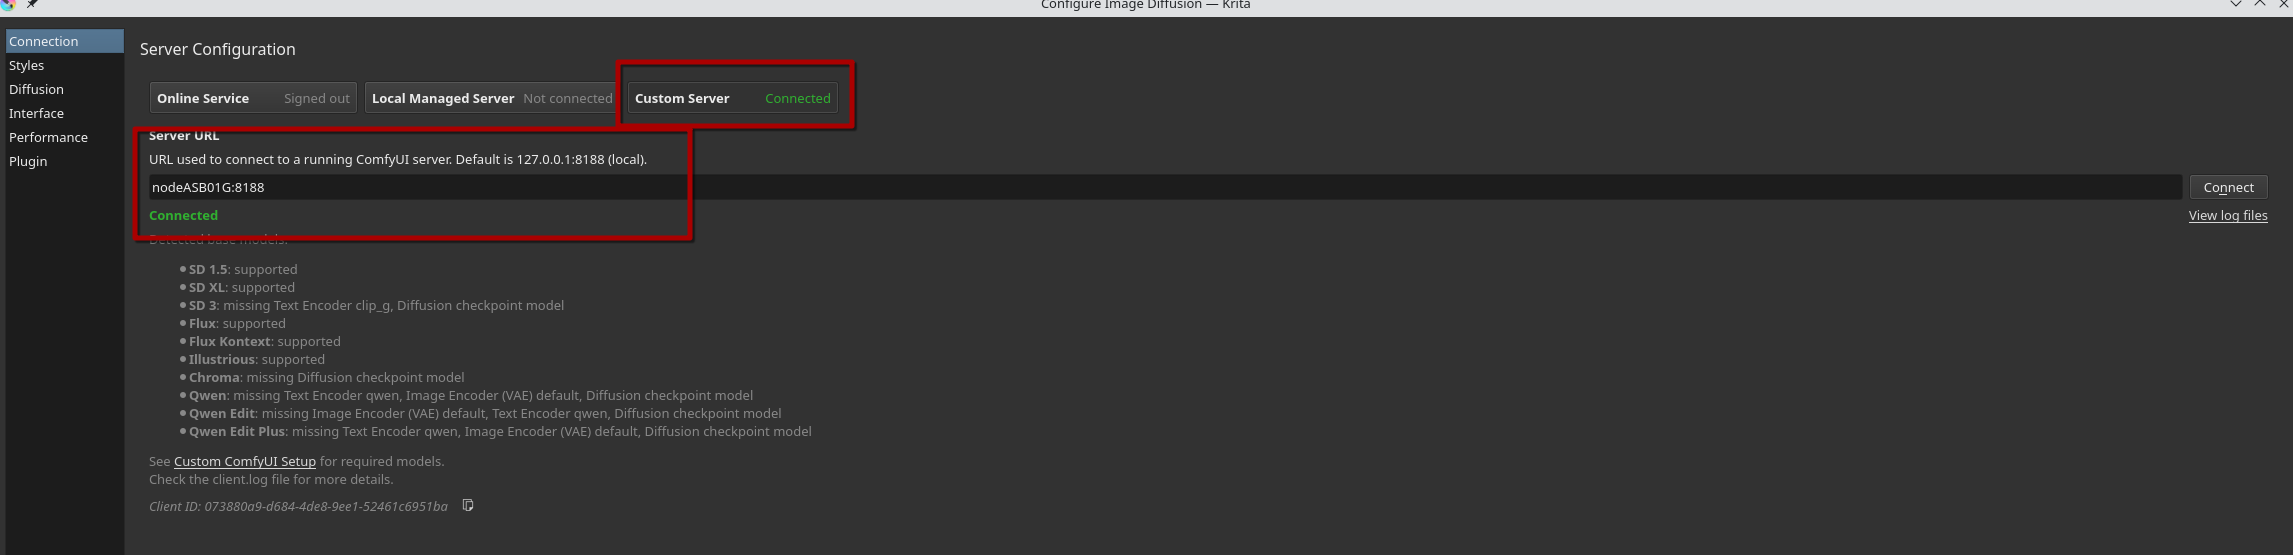
Using nodeASB01G
A ready-to-use server running on nodeASB01G.
Connect to the following custom server:
nodeASB01G:8188
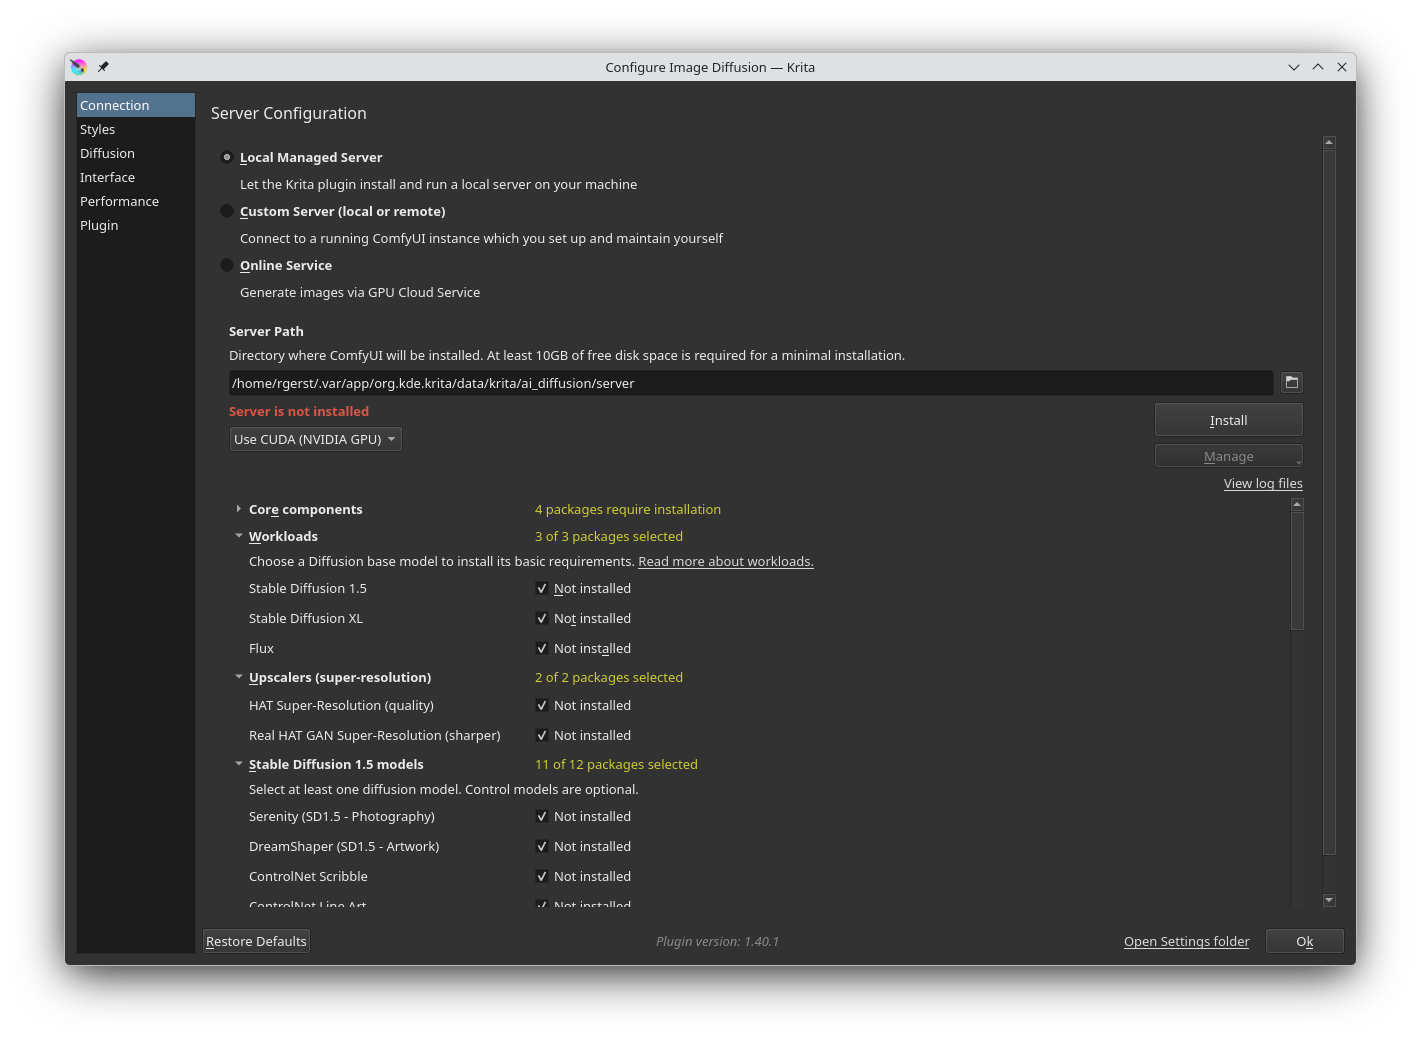
Local inference
This requires a good PC - especially when using Flux Kontext (Image editing)
- Just select "Local Managed Server"
- Select everything except the "IP Adapter" entries (installation is broken for me)
- Let it install by clicking the "Install" button. Ensure that you'll have enough space for the models (it's very very large!)