
WinBoat
WinBoat – Running Windows on Linux
Recommended and tested version: WinBoat 0.9.0
WinBoat 0.9.0 includes improved configuration options, such as custom FreeRDP Arguments, USB passthrough and display scaling.
This version has been tested on:
- Dell Precision 5860 workstations
- Lenovo ThinkPad P16 Gen 2 laptops
1. Using WinBoat
Starting and stopping Windows
The Home page shows whether the WinBoat Docker container is currently running.
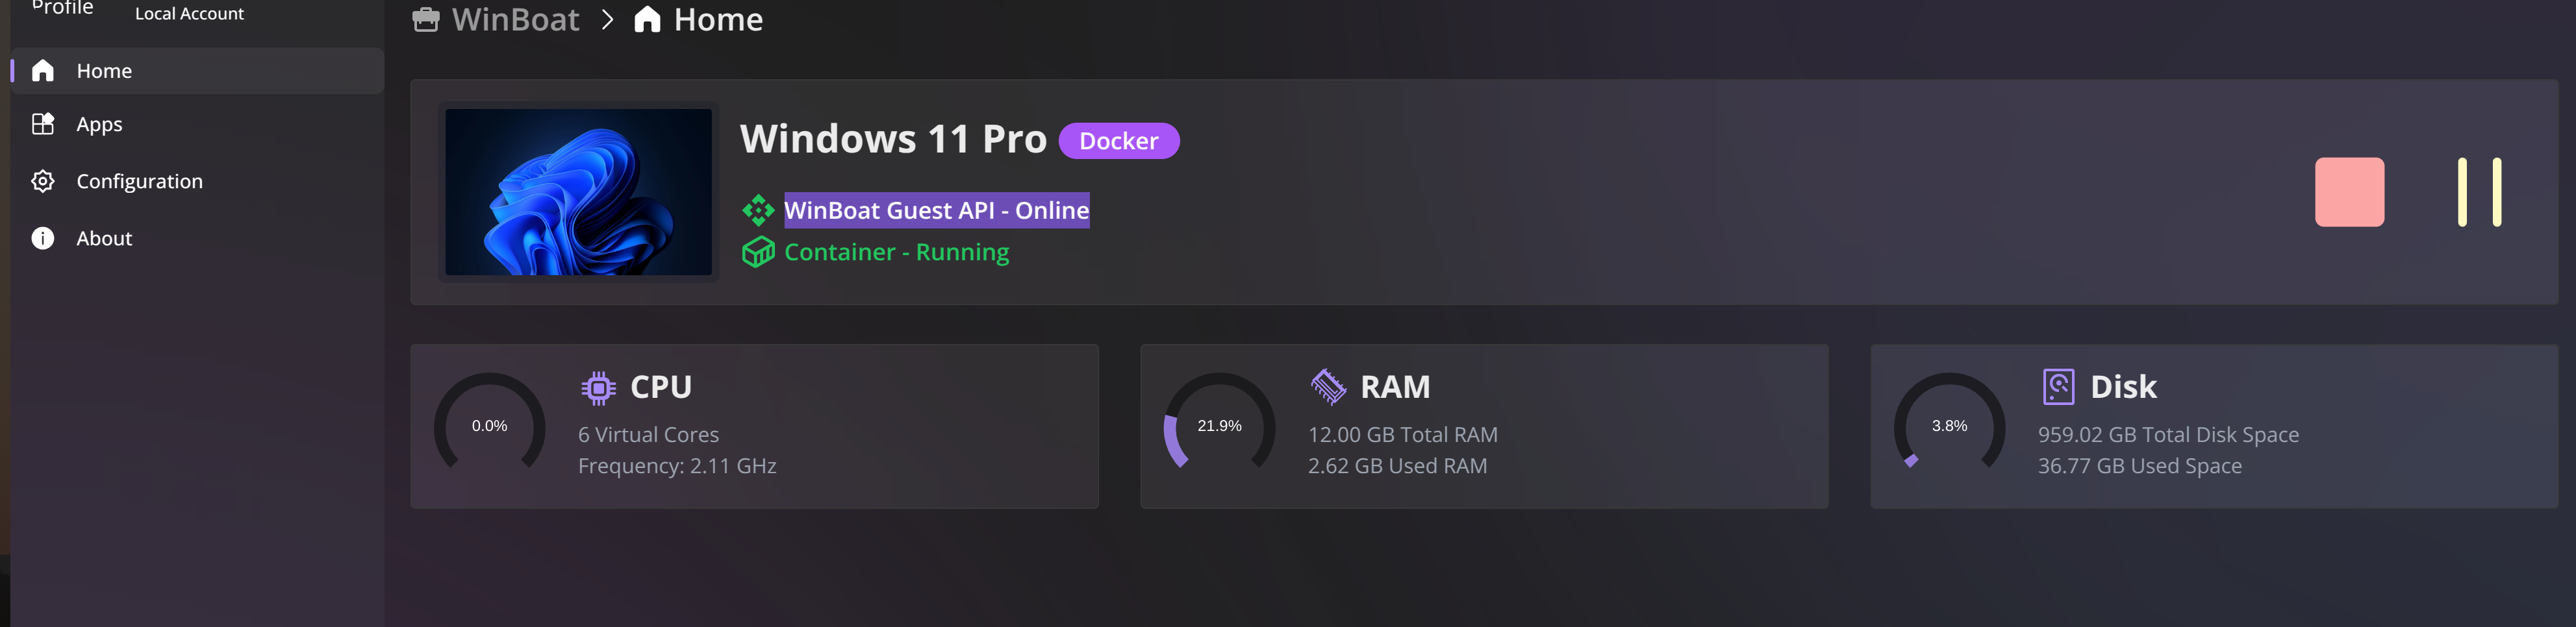
Normally:
- The container starts automatically when WinBoat is opened.
- The container stops after Windows has been shut down.
If Windows has been shut down and you want to start it again:
- Open the Home page in WinBoat.
- Click the Play button to start the Docker container.
- Wait until the container is shown as running and WinBoat Guest API displays Online.
- Open Windows Desktop.
If the container does not start automatically when WinBoat is opened, click the Play button manually. Windows Desktop cannot be opened until the container is running and WinBoat Guest API is online.
Using a USB device in Windows
To make a USB device available inside Windows:
- Open WinBoat.
- Click the Settings gear icon.
- Enable Experimental Features.
- Find USB Passthrough on the same Settings page.
- Click Add Device.
- Select the device that you want to use inside Windows.

The list can include USB drives, external storage devices and other compatible USB hardware.
If the device does not appear inside Windows, close Windows Desktop completely and open it again.
Once a device is added to Windows, it will no longer be available in Linux.

To make the device available in Linux again:
- Return to Settings → USB Passthrough.
- Find the device in the list.
- Click the minus (
−) button next to it.
WinBoat remembers the selected device. If the device is still connected when WinBoat is started again, it will automatically be passed through to Windows and will disappear from Linux until it is removed from the USB Passthrough list.
Changing the display size
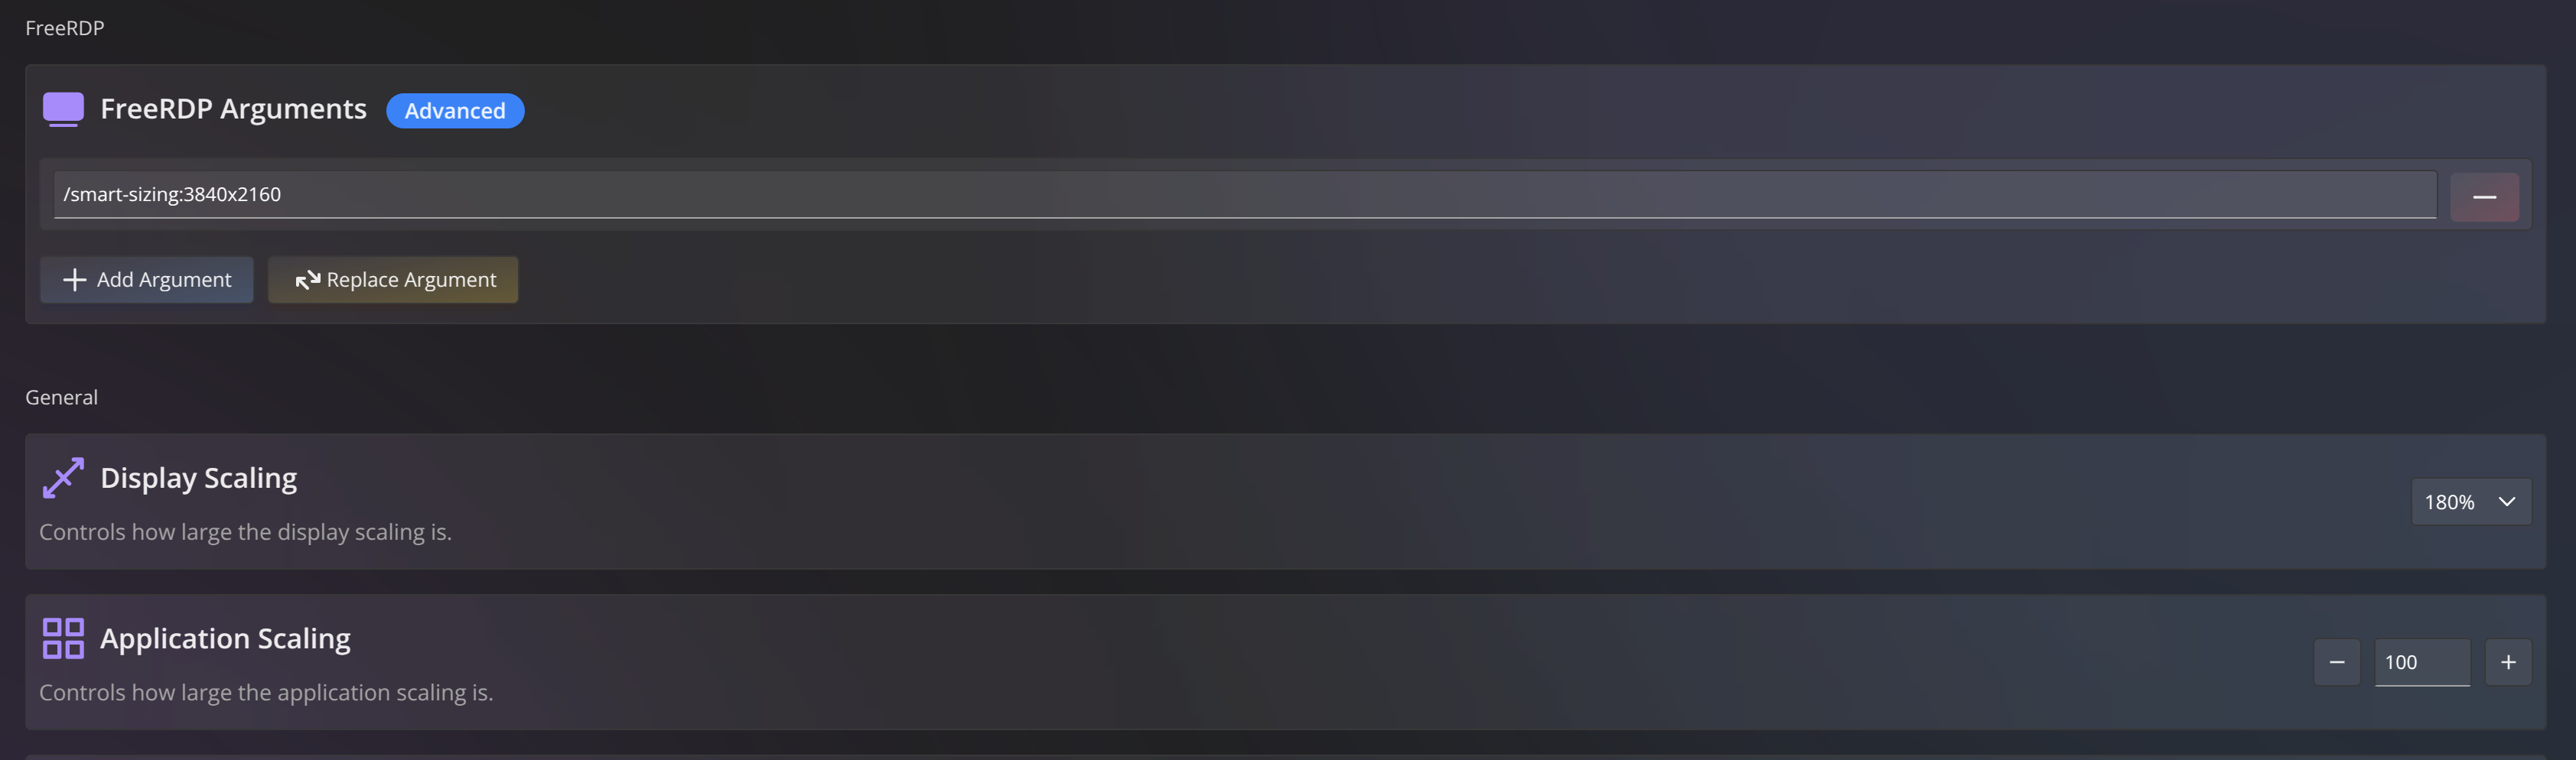
Open WinBoat, click the Settings gear icon and scroll down to the FreeRDP settings.
Display Scaling
Display Scaling changes the size of the complete Windows desktop.
A value between 100% and 180% can be selected. This is the recommended scaling option when Windows is opened through Windows Desktop.
Application Scaling
Application Scaling only affects Windows applications opened individually from the WinBoat application list.
Opening applications separately is currently not recommended because performance can be noticeably worse. For normal use, open the complete Windows Desktop instead.
Adjusting the Windows Desktop resolution
If Display Scaling at 180% is still insufficient:
- Open WinBoat.
- Click the Settings gear icon.
- Scroll down to the FreeRDP settings.
- Enable FreeRDP Arguments – Advanced.
- Click Add Argument.
- Enter an argument such as:
/smart-sizing:3840x2160- Close Windows Desktop completely.
- Open Windows Desktop again to apply the change.
Start with the native resolution of the monitor:
| Monitor resolution | FreeRDP argument |
|---|---|
| Full HD | /smart-sizing:1920x1080 |
| QHD | /smart-sizing:2560x1440 |
| 4K | /smart-sizing:3840x2160 |
The lower Windows resolution is enlarged to fill the available window, making the interface appear larger.
Display Scaling and smart sizing work together. Some combinations may make the Windows interface too large, too small, blurry or distorted.
For the best result:
- Start with the native resolution of the monitor.
- Adjust Display Scaling.
- If necessary, change the smart-sizing resolution.
- Change only one setting at a time and reopen Windows Desktop after each change.
If text and icons are still too small, try a lower resolution. For example, on a 4K monitor:
/smart-sizing:2560x1440For best image proportions, use a resolution with the same aspect ratio as the monitor. For example, use a 16:9 resolution on a 16:9 screen.
2. NVIDIA driver
The NVIDIA 595 driver has worked well with WinBoat on the Dell Precision 5860 and Lenovo ThinkPad P16 Gen 2 systems.
Install it with:
sudo apt update
sudo apt install nvidia-driver-595
sudo reboot
The nvidia-driver-595 package is available for Ubuntu 24.04.
After restarting, verify that the driver is active:
nvidia-smiThis installs the NVIDIA driver on the Linux host. It does not install an NVIDIA driver inside the Windows virtual machine.
3. Updating WinBoat to version 0.9.0
A normal update does not require reinstalling Docker, FreeRDP or Windows.
First, download the new package:
Download WinBoat 0.9.0 for Ubuntu/Debian
If the file is stored directly in Downloads, update WinBoat with:
sudo apt update
sudo apt install ~/Downloads/winboat-0.9.0-amd64.deb
When version 0.9.0 is already installed, APT displays:
winboat is already the newest version (0.9.0).After updating:
- Close and reopen WinBoat.
- Allow the WinBoat Guest Server to update if requested.
- Open the Windows Desktop.
- Test one Windows application.
Version 0.9.0 automatically performs the necessary migrations from older WinBoat versions. No manual migration or removal of the existing Windows machine should be necessary.
Do not use Reset or Remove VM for a normal update. These options can delete the existing Windows installation and its applications.
4. Complete WinBoat installation
Use this section for a new computer or when WinBoat and its required components must be installed again.
Download WinBoat
Download the Debian package:
Download WinBoat 0.9.0 for Ubuntu/Debian
The installation script must be executed from the directory containing:
winboat-0.9.0-amd64.debWinBoat requires KVM virtualization, Docker or Podman, Docker Compose when using Docker, and FreeRDP 3. Docker Desktop is not supported.
Installation script
Create the installation script:
nano install-winboat.shPaste the script content into Nano. In the terminal, use:
Ctrl + Shift + V#!/usr/bin/env bash
set -e
WINBOAT_PACKAGE="winboat-0.9.0-amd64.deb"
# Check whether the WinBoat package is in the current directory
if [ ! -f "$WINBOAT_PACKAGE" ]; then
echo "Error: $WINBOAT_PACKAGE was not found."
echo "Run this script from the directory containing the downloaded package."
exit 1
fi
# Repair incomplete packages and update Ubuntu
sudo apt --fix-broken install -y
sudo apt update
sudo apt upgrade -y
# Install curl
sudo apt install -y curl
# Install Docker if it is not already installed
if ! command -v docker >/dev/null 2>&1; then
curl -fsSL https://get.docker.com -o get-docker.sh
sudo sh get-docker.sh
rm -f get-docker.sh
else
echo "Docker is already installed."
fi
# Create the Docker group if it does not already exist
getent group docker >/dev/null || sudo groupadd docker
# Add the current user to the Docker group
sudo usermod -aG docker "$USER"
# Enable and start Docker
sudo systemctl enable docker
sudo systemctl start docker
# Install Docker Compose
sudo apt update
sudo apt install -y docker-compose-plugin
# Install FreeRDP 3
sudo apt install -y freerdp3-x11 freerdp3-wayland
# Load the network modules used by WinBoat
printf "ip_tables\niptable_nat\n" |
sudo tee /etc/modules-load.d/iptables.conf >/dev/null
# Install WinBoat
sudo apt install -y "./$WINBOAT_PACKAGE"
echo
echo "WinBoat installation completed."
echo "The computer will now restart."
sudo rebootSave the file:
Ctrl + OPress Enter to confirm the filename, and then close Nano:
Ctrl + XExecute the script
Open a terminal in the directory containing the script and the .deb file.
For example:
cd ~/DownloadsMake the script executable:
chmod +x install-winboat.shRun it:
./install-winboat.shThe computer restarts at the end so that the new Docker group membership becomes active.