Locally hosted AI agents (old)
This is the old version where you connect directly to Ollama.
AI agents now have progressed to a level where they can be quite useful to do even larger structural tasks on whole projects. This is often done using specialized IDE (for example Cursor) or plugins (JetBrains AI, Roo Code). There are even terminal-based tools, for example aider.
While we have ChatGPT, I was not able to get an OpenAI API key to run (it always says we are rate-limited). But fortunately we can host very capable AI agents on our four GPU servers:
| Server | Hardware | Models |
|
nodeASB03G nodeASB04G |
1x Nvidia H200 140GB VRAM + 1.48TB RAM |
GLM 4.5-Air ( Qwen3-Coder ( Gemma3 ( |
|
nodeASB01G nodeASB02G |
4x Nvidia A40 44GB VRAM + 1TB RAM |
Qwen3-Coder ( Gemma3 ( |
The models are hosted via ollama, which listens to instructions on port 11434. I tested both Jetbrains AI and Roo Code.
Requirements
Because IT does not allow direct connections to servers on all ports, you will need to setup a SSH Tunnel to proxy the ollama server running on the node to your local PC:
ssh -L 11435:localhost:11434 USER@SERVER(I used port 11435 as local port in the case if you have a local ollama)
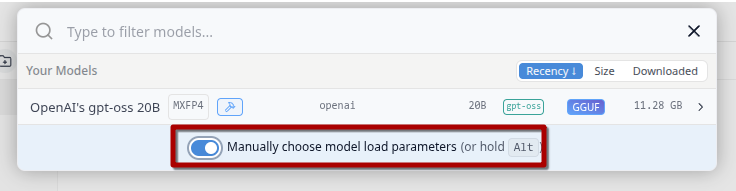
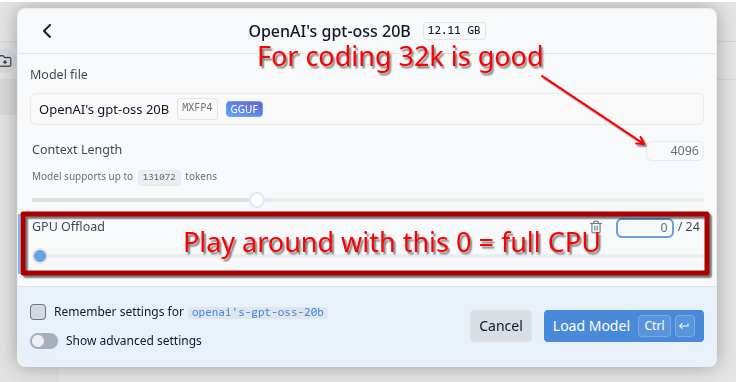
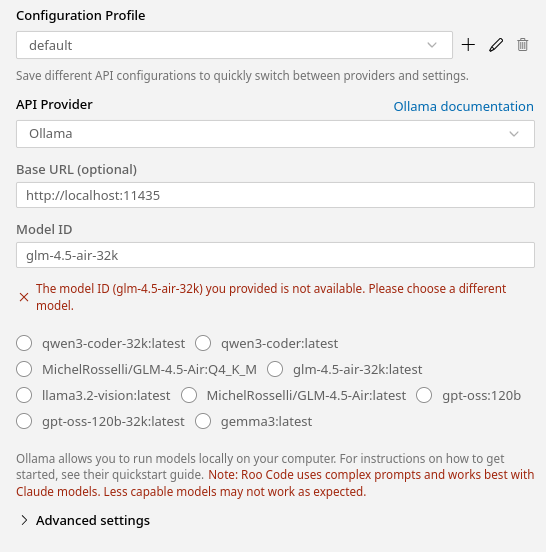
Info: Always use the 32k model as the main one. The context window of the other models is 2k, which is not enough for AI agent tasks.
Usage with Roo Code (best result so far!)
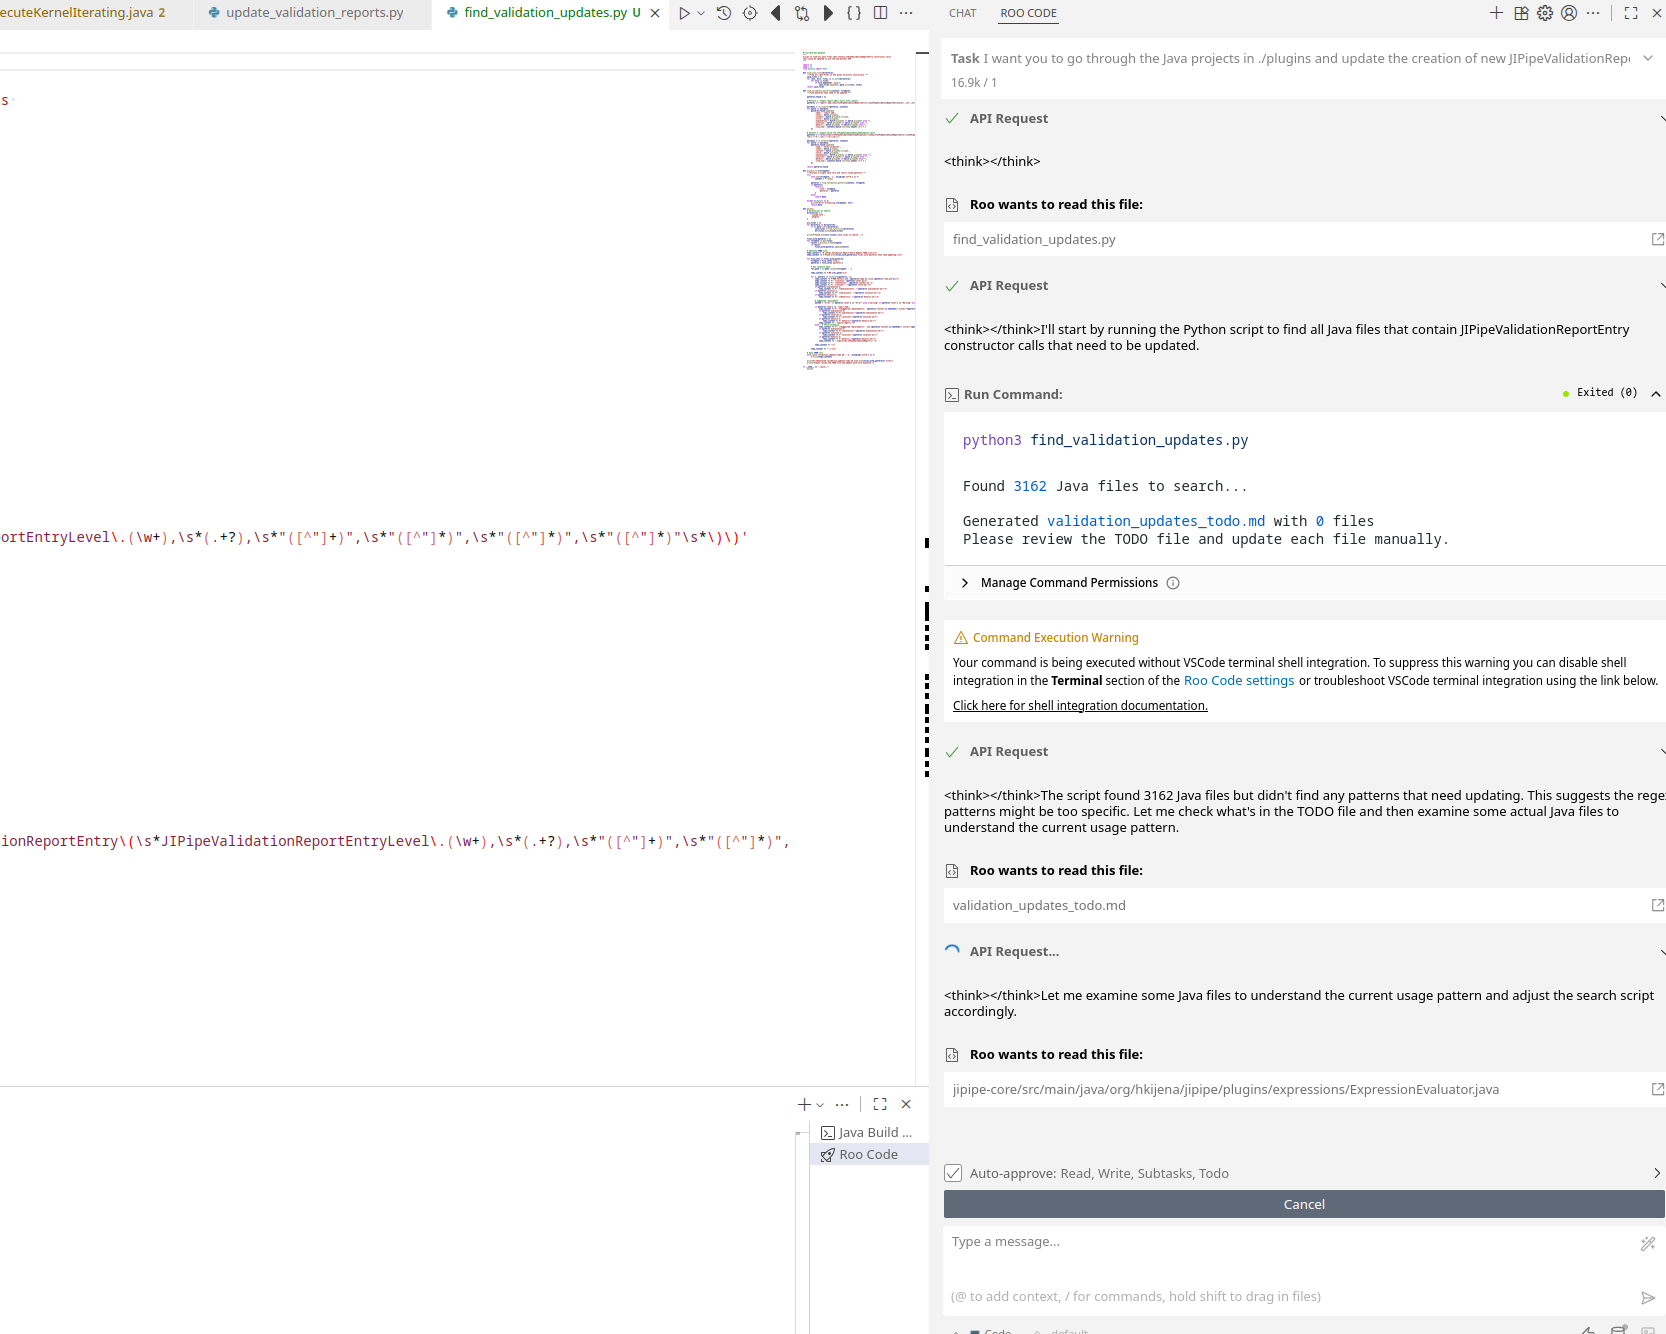
Roo Code is a plugin for Visual Studio Code which adds very powerful AI agent capabilities into the software. Install it using the Extension panel on the left side.
During the initial setup, put in the appropriate values. Ignore the warning that the model does not exist.
Roo Code has multiple modes:
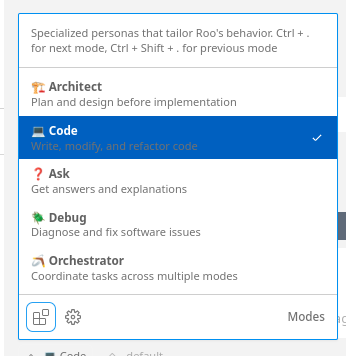
If you want to do simple edits, go with the Code mode. For larger changes that may require multiple steps, use the Orchestrator mode.
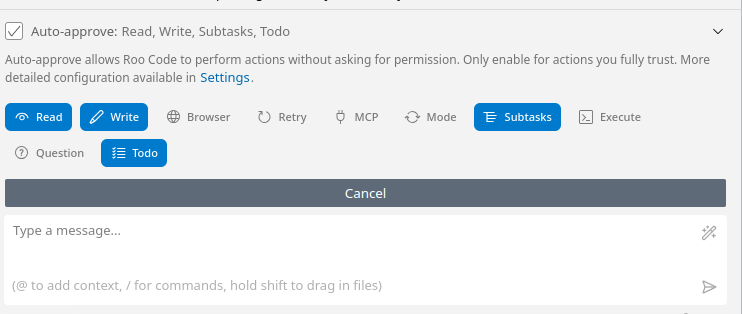
By default Roo Code will ask to approve any action that it will take. Use the button above the chat to selectively turn on auto-approve (careful with commands! see here)
Examples
| Task | Prompt |
| Make a new API for my reportValidity that is easier to work with |
I want you to enhance how the reportValidity functions are used. Currently JIPipeValidationReportEntry instances need to be instantiated manually like this: report.add(new JIPipeValidationReportEntry(JIPipeValidationReportEntryLevel.Error, (there is also another constructor where the solution and details information is left out) I want you to add the necessary code to streamline this a bit more, so we can do something like this: reportContext.apiError().error().title("No algorithm was provided").explanation(This is an programming error. Please contact the JIPipe author").report(report); You see that here I can also leave out the .solution(String) and .details(String) The JIPipeValidationReportContext should have 3 basic builder starters: JIPipeValidationReportContext.error() where I can quickly throw and error, warning or do something custom. Add the necessary code into JIPipeValidationReportContext and then go through each Java file where reportValidity is implemented and adapt the code there. Also analyze the code if there are common use cases that can be also turned into additional builder starters for JIPipeValidationReportContext, for example null checks etc. |
| Convert usages of my old API into a new one. Many files involved, so I suggest a Python script as TODO list. |
I want you to go through the Java projects in ./plugins and update the creation of new JIPipeValidationReportEntry instances to the newly introduced API in JIPipeValidationReportContext that given such a context allows me to use the easier to read builder-style functions. For example I now can do instead of report.add(new JIPipeValidationReportEntry(JIPipeValidationReportEntryLevel.Error, do the following: reportContext.error().title("Invalid expression syntax").explanation(exception.getMessage()).solution( "Please fix the expression").details(ExceptionUtils.getStackTrace(exception)).report(report); The JIPipeValidationReportContext also has additional helpers for common assertions. Because there are so many files in there, first make a Python script that scans for file candidates to be added to a TODO list. Then edit each file one-by-one, as there are many complex and large Java classes. Close each file after editing. |
Usage with Jetbrains AI
- Install the Jetbrains AI plugin and let it activate. You do not have to pay for it or start any trial, as we're going to use the local model option
- When the plugin is initialized, select the option that you will stay within the free plan
- Setup the model as following:
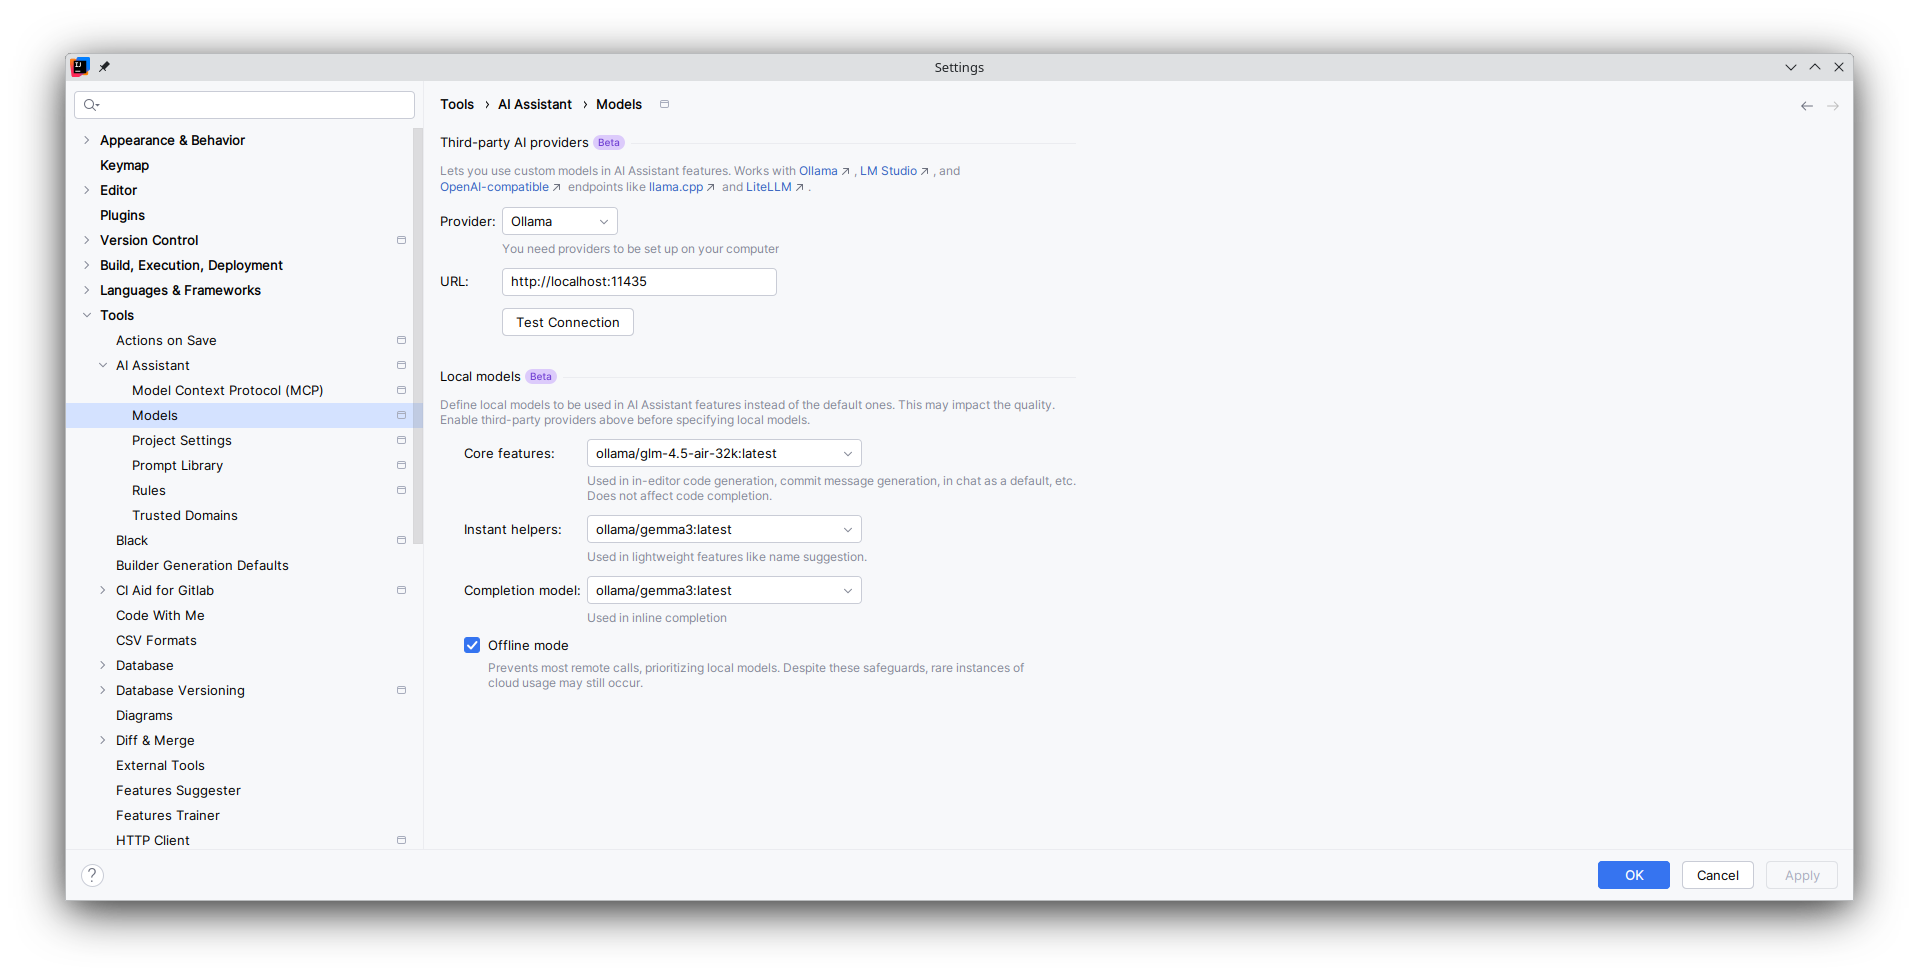
Please note that Jetbrains' ollama integration is not that good yet and you may have to click some generation button multiple times. I also experienced that the Edit mode is not that great and you are better off with using Roo Code for that.
Host models on your PC
Please note that running AI models requires a strong PC; ideally with a GPU. Otherwise ollama/lmstudio will keep everything in RAM and run everything through CPU computing which is very slow.
Ollama
I recommend ollama only for server-side usage or if dependent tools don't support lmstudio. You can follow the official installation instructions to get ollama working.
Usage:
# Pull a model

ollama pull gemma3

# Run a model (will pull if model does not exist)

ollama run gemma3
The default context size of ollama is 2048 tokens, which is quite small. You'll have to create a new model with a changed context size:
ollama run gemma3

/set parameter num_ctx 32768
/save gemma3-32k
/exit

# Now you can run the new model

ollama run gemma3-32k
Lmstudio
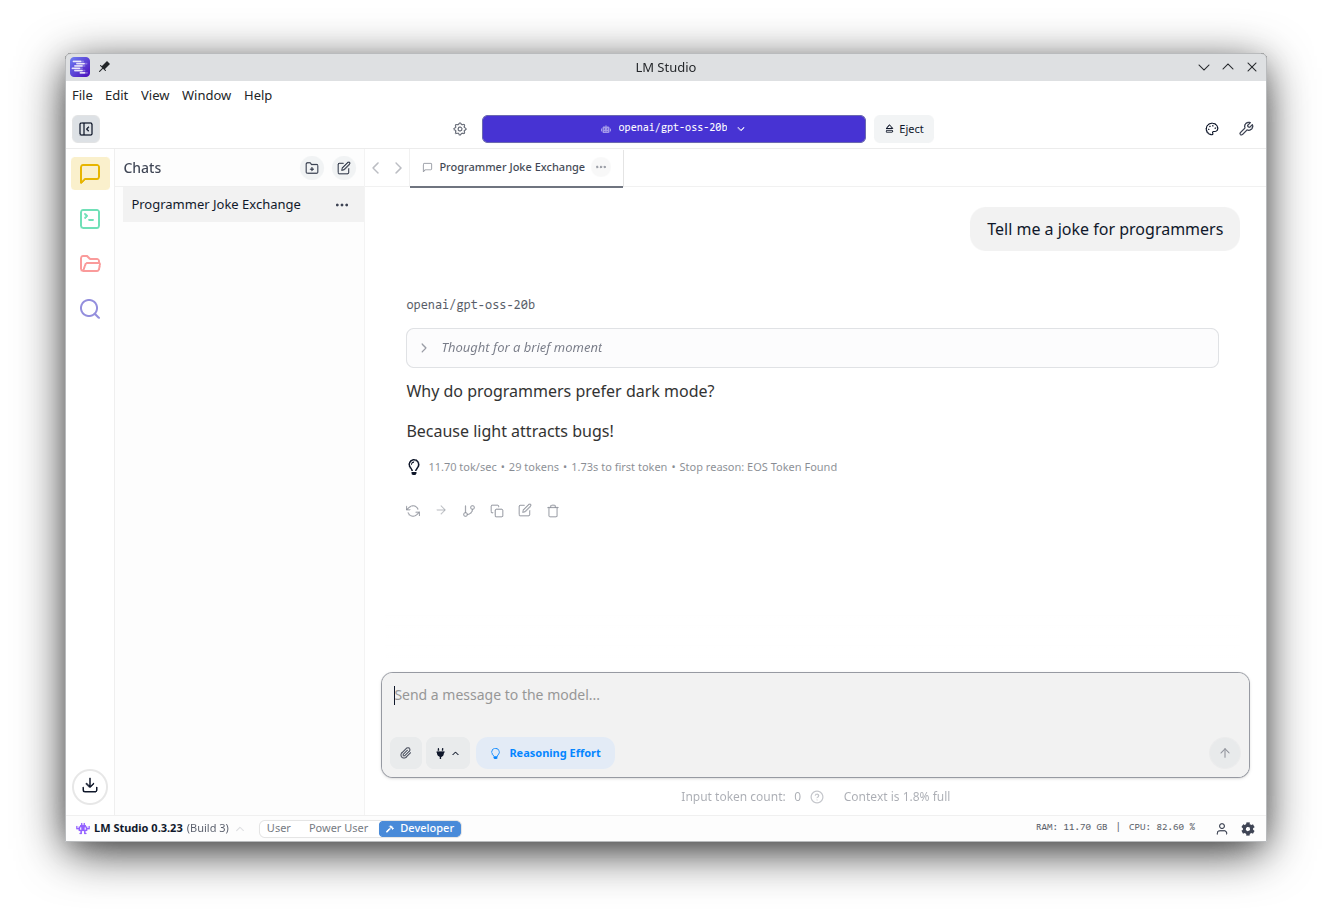
Lmstudio is a graphical interface that allows you to download and run local chat bots. It also has an optional server component that can be enabled, so other tools can make use of its backend.
On Linux it is distributed as AppImage. I highly recommend to install Gear Lever, which helps with installing AppImages (Open the AppImage with Gear Lever). Lmstudio also works very well on Windows.
If your computer does not have enough VRAM for a model, you can always let it be (partially) run on CPU: